
To effectively teach cursive handwriting, you should use a sequential approach that starts with foundational motor skills and basic strokes before moving on to letter formation, connections, and sentence writing. This methodical process ensures learners develop the necessary components for fluid, legible cursive without feeling overwhelmed. While keyboarding is common, learning cursive offers significant benefits, including improved fine motor control, better hand-eye coordination, and increased writing speed. As an occupational therapist, I have seen how a structured plan can make all the difference for students.
This guide breaks down the process into clear, actionable steps for therapists, educators, and parents. By focusing on developmental readiness and logical progression, you can help any learner master the art of cursive handwriting.
Step 1: Establish a Strong Foundation for Writing
Before introducing a single cursive letter, it is critical to ensure the learner has a solid base for writing. This preparation prevents bad habits and reduces physical strain. These pre-writing skills are essential for comfort, endurance, and overall success. Neglecting them can lead to fatigue, messy handwriting, and frustration. Think of this as building the foundation of a house; without it, everything that follows will be unstable. Focusing on these core developmental skills examples for children sets the stage for effective learning.
Key areas to address include:
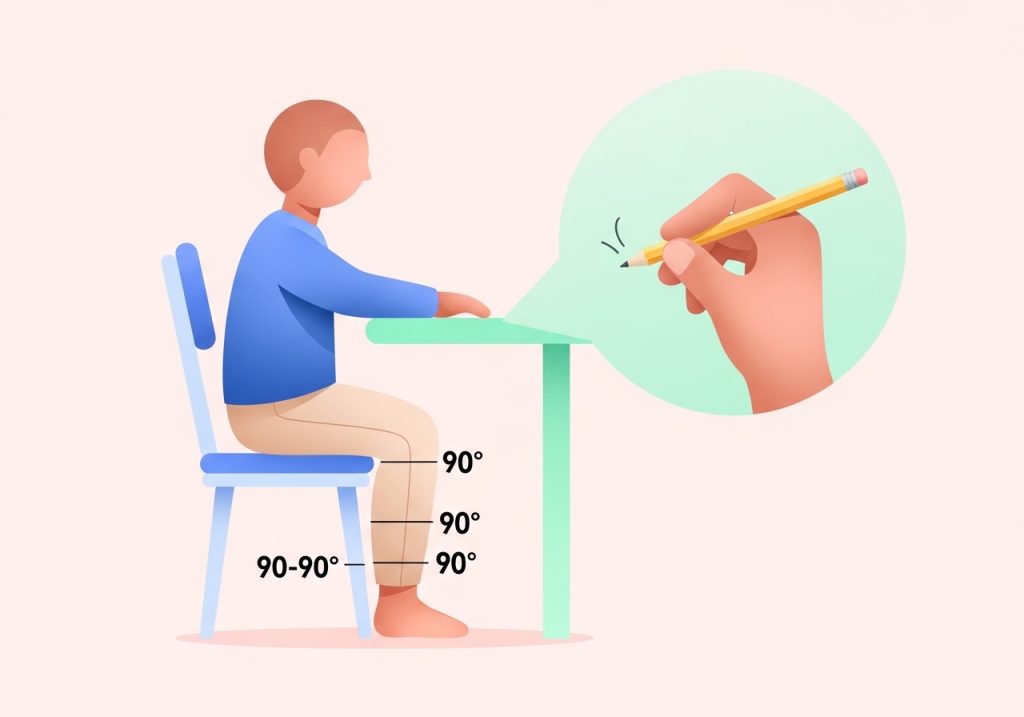
- Proper Posture: The learner should sit with their feet flat on the floor, their back straight against the chair, and their hips and knees bent at a 90-degree angle. The desk should be at a comfortable height, allowing the forearms to rest on the surface without hunching the shoulders.
- Paper Positioning: The paper should be slanted to match the natural arc of the writing arm. For right-handed writers, the top right corner of the paper should be tilted up. For left-handed writers, the top left corner should be tilted up. This alignment promotes a more natural and fluid arm movement.
- Functional Pencil Grasp: An efficient pencil grasp, like the dynamic tripod grasp, allows for precise finger movements. The pencil should be held between the thumb and index finger, resting on the middle finger. An inefficient grasp can cause hand fatigue and limit writing control.
Step 2: Introduce the Basic Cursive Strokes
Cursive letters are not random shapes; they are combinations of a few foundational strokes. By teaching these strokes first, you provide learners with the building blocks they need to form any letter. This approach simplifies the learning process and helps students understand the patterns within the cursive alphabet. Practice these strokes in isolation until the learner can produce them automatically and with a smooth, continuous motion. Use multi-sensory methods like drawing in sand, using a finger on a tablet, or writing on a large whiteboard to make practice engaging.
The primary cursive strokes include:
- Undercurve: Starts at the baseline, curves up, and ends. This is the beginning stroke for letters like i, t, and u.
- Overcurve: Starts at the baseline, humps over, and comes back down. This stroke is used in letters like n, m, and v.
- Up-and-Down Stroke: A straight line that goes down to the baseline and back up, like in the letters t and d.
- Ascending Loop: A tall loop that extends above the midline, found in letters like l, h, and b.
- Descending Loop: A loop that extends below the baseline, used in letters such as g, y, and j.
Step 3: Teach Lowercase Letters in Logical Groups
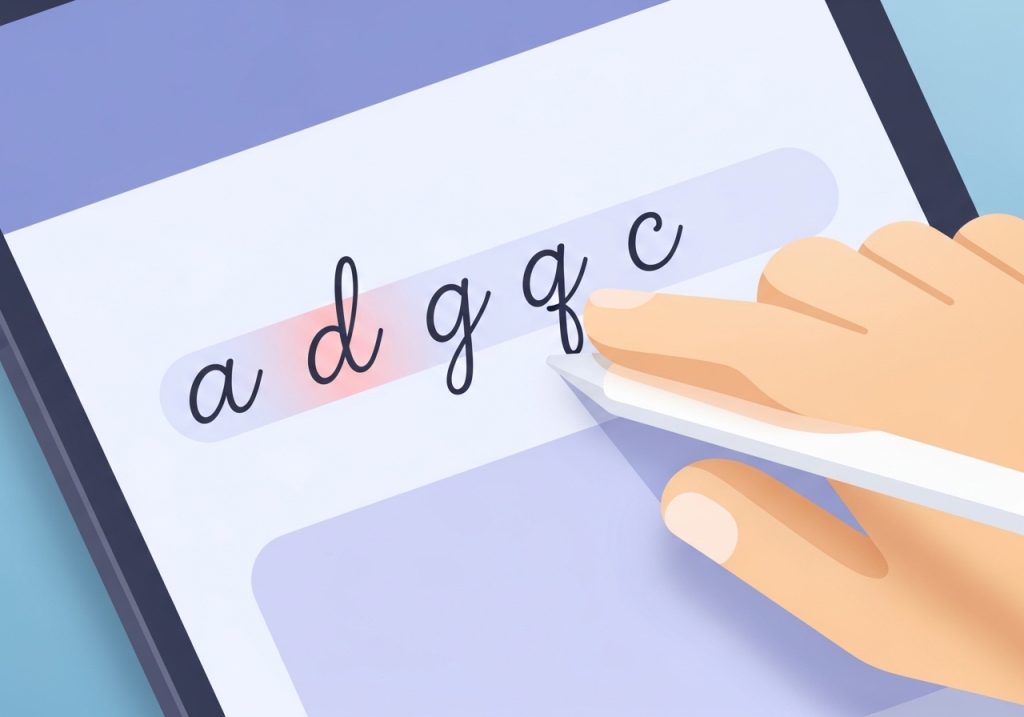
Instead of teaching letters in alphabetical order, group them by their initial motor pattern. This method, often recommended by occupational therapists, helps learners recognize similarities between letters and reinforces the basic strokes they just learned. For example, once a student masters the “climb and slide” motion for the letter ‘a’, they can easily apply that same pattern to ‘d’, ‘g’, and ‘q’. This strategy accelerates learning and builds confidence. According to advice from other OTs, it is best to focus on flowing movements and letters with similar lead-in strokes.
Here is an example of how you can group lowercase letters:
- Undercurve Letters (Climb and Slide): a, c, d, g, o, q
- Loop Letters: e, l, b, h, k, f
- Overcurve Letters (Hump Letters): n, m, v, x, y, z
- Letters with unique formations: i, j, p, r, s, t, u, w
Step 4: Practice Connecting Letters to Form Words
The main characteristic of cursive is the continuous flow between letters. Once a student is comfortable forming individual lowercase letters, the next step is to teach them how to connect them. This is often the most challenging part of learning how to cursive handwriting. Begin with simple two-letter combinations, focusing on how the exit stroke of one letter becomes the entry stroke of the next. Explicitly teach the different types of connections to avoid confusion.
Start with simple combinations and gradually increase complexity:
- Two-Letter Pairs: Practice common pairings like ‘at’, ‘in’, ‘on’, ‘er’, and ‘es’.
- Short Words: Move on to three-letter CVC (consonant-vowel-consonant) words like ‘cat’, ‘sun’, and ‘pig’.
- High-Frequency Words: Introduce frequently used words such as ‘the’, ‘and’, ‘is’, and ‘you’ to build fluency.
Emphasize maintaining consistent size, slant, and spacing as learners begin connecting letters into words.
Step 5: Introduce and Practice Uppercase Letters
Uppercase cursive letters are often taught after lowercase because most of them do not connect to the following letter in a word. They typically stand alone at the beginning of names and sentences. Because they are more ornate, it is helpful for students to have a strong grasp of basic motor control before tackling them. Teach each uppercase letter individually, focusing on its unique formation. Practice them in a functional context, such as writing the student’s name or the names of family members.
Step 6: Progress to Writing Sentences and Paragraphs
The final stage is to apply all the learned skills to functional writing. This is where fluency, speed, and automaticity develop. Consistent practice is key. Encourage learners to use their cursive skills in meaningful ways to keep them motivated. The goal is for cursive to become a natural and efficient tool for communication, not just a drill.
Meaningful practice activities could include:
- Writing short journal entries daily.
- Copying favorite quotes, poems, or song lyrics.
- Writing thank-you notes or letters to friends and family.
- Creating stories or summaries of books they have read.
As you move into this stage, you may want to explore more structured options. Finding the right program is a crucial part of the process, and knowing how to choose a handwriting curriculum can provide a clear path forward. You can supplement any program with a variety of engaging, practical education materials for teachers and therapists that make skill-building fun.
Teaching cursive is a rewarding process that builds valuable lifelong skills. By following these steps in a patient and systematic way, you provide learners with the tools they need for legible, fluid, and confident handwriting. Remember to adapt the pace to the individual’s needs and celebrate small victories along the way. The primary goal is not perfection but functional and comfortable communication.
Ready to put these strategies into action? Finding high-quality, engaging materials can simplify your planning and support your learners’ success. Visit The Inspiring OT shop on Teachers Pay Teachers to find a wide selection of OT-created printable activities, worksheets, and guides designed to build fine motor, handwriting, and sensory skills. Empower your students with resources crafted from nearly two decades of clinical experience.
Explore practical, low-prep resources at The Inspiring OT store today.
Leave a Reply