
Learning how to write in cursive writing involves a systematic approach that begins with proper posture and foundational strokes, then progresses through letter groups, connections, and finally, sentence fluency. While it may seem complex, breaking down the process into manageable steps makes teaching and learning cursive an achievable goal for therapists, educators, and parents. This guide provides a structured framework for developing legible and efficient cursive handwriting.
Cursive writing offers significant benefits beyond simple communication. The connected letters and fluid motions can improve writing speed and automaticity, freeing up cognitive resources for students to focus on the content of their writing. The process also refines visual-motor coordination and strengthens the small muscles in the hand, which is an important part of developing fine motor skills. For many learners, the rhythmic nature of cursive can be a more comfortable and less strenuous way to write than print.
Step 1: Establish Proper Posture and Paper Position
Before any writing begins, setting up the physical environment is crucial for success. Correct posture and paper placement prevent fatigue and promote better motor control. The goal is to create a stable and comfortable base for the intricate movements of cursive writing.
Ensure the learner is seated properly:
- Chair and Desk Height: The learner’s feet should be flat on the floor with their knees bent at a 90-degree angle. The desk height should allow their elbows to rest comfortably on the surface, also at a 90-degree angle.
- Upright Posture: Encourage the learner to sit up straight, avoiding slumping. A stable core provides the foundation for controlled arm and hand movements.
- Paper Angle: The paper should be slanted. For right-handed writers, the top right corner of the paper should be tilted up. For left-handed writers, the top left corner should be tilted up. This angle allows the writing arm to move naturally across the page.
- Pencil Grip: A functional tripod grip (using the thumb, index, and middle fingers) is ideal. The pencil should rest gently in the hand, not gripped too tightly, to allow for fluid movement.
Step 2: Master the Foundational Cursive Strokes
Cursive letters are built from a few basic, repeated movements. Practicing these foundational strokes in isolation helps build the motor memory required for forming letters automatically. Repetition is key here. Focus on smooth, continuous motions rather than perfect forms at first. These strokes are the building blocks for every letter the student will learn.
The primary strokes to practice include:
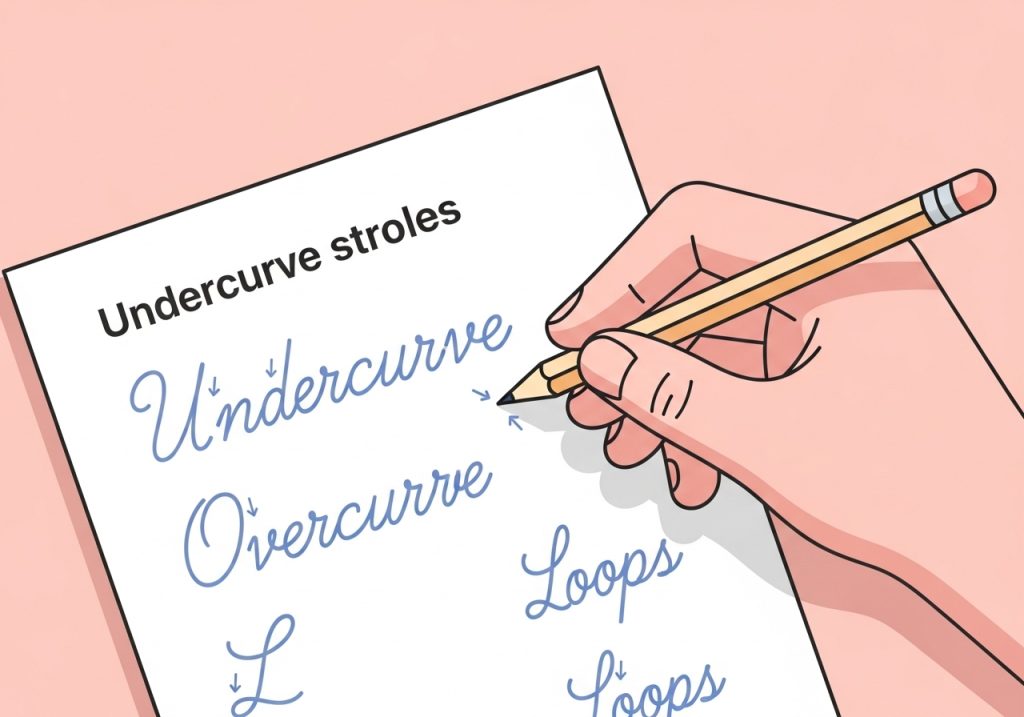
- Undercurve: A smiling stroke, like the bottom of a ‘u’.
- Overcurve: A frowning stroke, like the top of an ‘n’ or ‘m’.
- Downcurve: A stroke that curves down and to the left, like the start of an ‘a’ or ‘c’.
- Slant Line: A straight, diagonal line that forms the basis of letters like ‘i’ and ‘t’.
- Loops: Both ascending loops (for letters like ‘l’ and ‘h’) and descending loops (for letters like ‘g’ and ‘j’).
Step 3: Teach Lowercase Letters in Similar Motor Groups
Instead of teaching letters alphabetically, it is more effective to group them by their initial stroke. This approach, supported by educators and therapists, reinforces motor patterns and makes learning more intuitive. By mastering one stroke, a learner can quickly form several letters. According to The OT Toolbox, grouping letters based on formation helps children recognize motor patterns.
A common method is to group letters as follows:
- Undercurve Letters: i, t, u, w, j, p, r, s
- Downcurve Letters (Clock Climbers): a, c, d, g, q, o
- Overcurve Letters (Hump Letters): n, m, v, x, y, z
- Loop Letters: e, l, h, k, b, f
Start with one group and practice until the learner shows confidence before moving to the next. Focus on correct starting points, stroke direction, and letter height.
Step 4: Practice Uppercase Letter Formation
Once lowercase letters are familiar, introduce their uppercase counterparts. Many uppercase cursive letters are more ornate and, importantly, often do not connect to the following lowercase letter in a word. This is a common point of confusion, so it is helpful to address it directly.
When teaching uppercase letters, emphasize:
- Correct Formation: Like lowercase letters, each uppercase letter has a specific formation path. Use worksheets with numbered arrows to guide the learner.
- Size and Proportion: Ensure uppercase letters are taller than lowercase letters and sit correctly on the baseline.
- Practice in Context: Practice writing names, the beginnings of sentences, and proper nouns to reinforce when to use uppercase letters.
Step 5: Focus on Connecting Letters to Form Words
The defining characteristic of cursive is the connection between letters. This is where the fluency of the script develops. The entry and exit strokes learned with individual letters are now used to join them together into words. This is a big step that requires patience and practice.
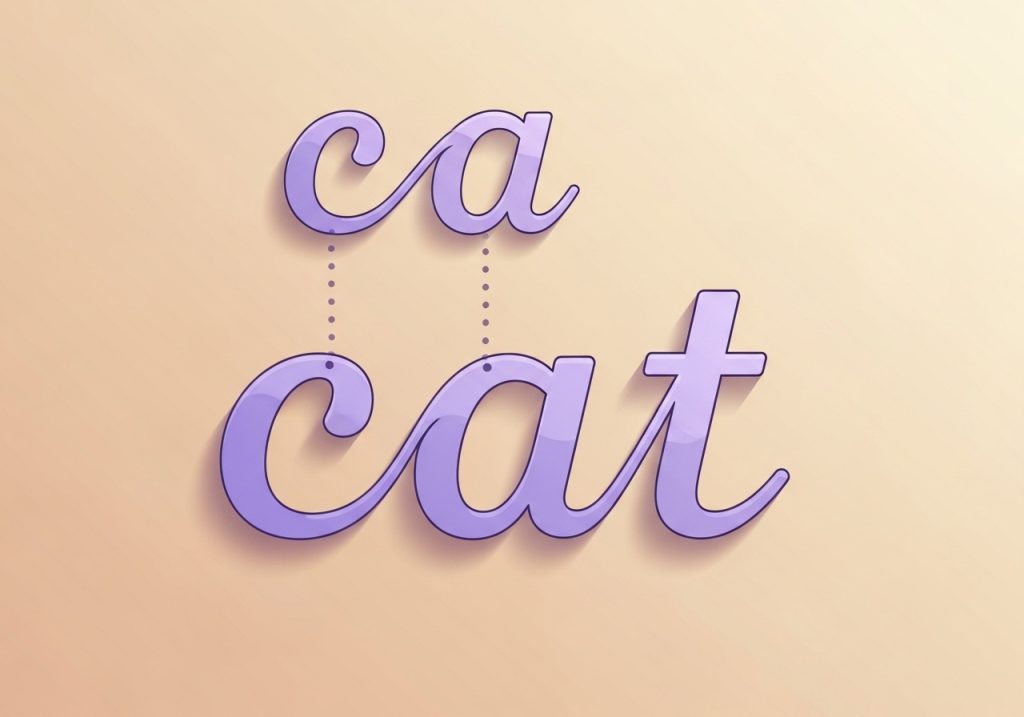
Begin by connecting just two letters, focusing on how the exit stroke of the first letter flows directly into the entry stroke of the second. Teaching letter combinations that share similar connection patterns can be helpful. For example, practice words with lots of undercurve connections (like “it” or “is”) before moving to more complex transitions. Gradually build up to three-letter words, then longer ones. Pay close attention to spacing between letters to ensure readability.
Step 6: Build Fluency with Sentence and Paragraph Writing
The final stage is to move from writing isolated words to composing full sentences and paragraphs. This is where all the individual skills come together. The focus shifts from letter formation to overall legibility, speed, and endurance. Consistent practice is the most important factor in this stage.
Activities to build fluency include:
- Copywork: Have the learner copy short, interesting sentences or paragraphs. This allows them to focus solely on the mechanics of writing without having to compose thoughts.
- Journaling: Encourage low-stakes writing, like a daily journal, where the goal is expression rather than perfection.
- Dictation: Read a sentence aloud and have the learner write it down. This helps build the connection between spoken and written language and improves writing speed.
At this stage, provide feedback on spacing between words, consistent slant, and uniform letter size. These elements are all part of a larger strategy for anyone looking to find out how to improve the handwriting in general.
Learning how to write in cursive writing is a valuable process that develops motor skills, enhances writing efficiency, and builds confidence. By following a structured, step-by-step approach from posture to paragraph, educators and therapists can guide learners toward mastering this timeless skill. Remember that consistency and patience are more important than perfection, especially in the early stages.
Ready to support your learners with practical, engaging resources? The Inspiring OT offers a wide range of printable activities and guides designed by an experienced occupational therapist. Explore our shop for low-prep worksheets, assessments, and toolkits that make skill-building effective and fun. Find the perfect tools to support handwriting, fine motor skills, and more at The Inspiring OT on Teachers Pay Teachers.
Leave a Reply