
Handwriting can be a source of frustration for many learners, and for the educators and parents supporting them. When a child struggles to form letters or produce legible work, it can impact their confidence and academic performance. If you’re wondering how to improve on handwriting, the good news is that it’s a complex skill that can be developed with a structured and patient approach. This guide provides a step-by-step process, informed by occupational therapy principles, to help you support your learner effectively and build a strong foundation for written communication.
Step 1: Build a Strong Foundation (Posture, Strength, and Grasp)
Legible handwriting starts long before a pencil touches paper. A stable body provides the necessary support for fine motor control in the hands and fingers. This concept, often called proximal stability for distal mobility, means that strength and stability in the trunk and shoulders allow for precise movements in the hands and fingers. Without a strong foundation, a child will struggle with the endurance and precision required for writing.
Posture and Core Strength
Proper seating is critical. Encourage a “90-90-90” posture: feet flat on the floor, knees bent at a 90-degree angle, and hips also at a 90-degree angle. The desk height should allow the elbows to rest comfortably on the surface at a 90-degree angle. This position provides stability through the trunk, freeing up the arms and hands for controlled movement. If a child’s feet don’t reach the floor, use a stool or a stack of books to provide support. Activities that build core strength, like animal walks, yoga poses, or playing on swings and climbing equipment, also contribute to better postural control during writing tasks.

Pencil Grasp
An efficient pencil grasp allows for fluid finger movements and prevents fatigue. The dynamic tripod grasp (thumb, index, and middle fingers working together) is often considered ideal, but other functional grasps exist. The key is that the grasp allows for finger-based movement rather than whole-arm movement. Signs of an inefficient grasp include a very tight grip, a hand that tires quickly, or using the whole arm to move the pencil. To encourage a better grasp, use small tools. Broken crayons or golf-sized pencils naturally promote a fingertip grasp. Activities like using tongs to pick up small items, playing with clay, or squeezing spray bottles can strengthen the small muscles needed for a mature grasp.
Step 2: Master Pre-Writing Strokes
Letters are made of lines and curves. Before a child can form an ‘A’, they must be able to make a vertical line, a horizontal line, and diagonal lines. These pre-writing strokes develop in a predictable sequence based on motor development. For example, vertical and horizontal lines typically develop before a child can make a circle or a cross. Practice these foundational shapes before moving on to letters to ensure the child has the necessary motor skills.
- Vertical line (|)
- Horizontal line (—)
- Circle (O)
- Cross (+)
- Square (☐)
- Diagonal lines (/ )
- X
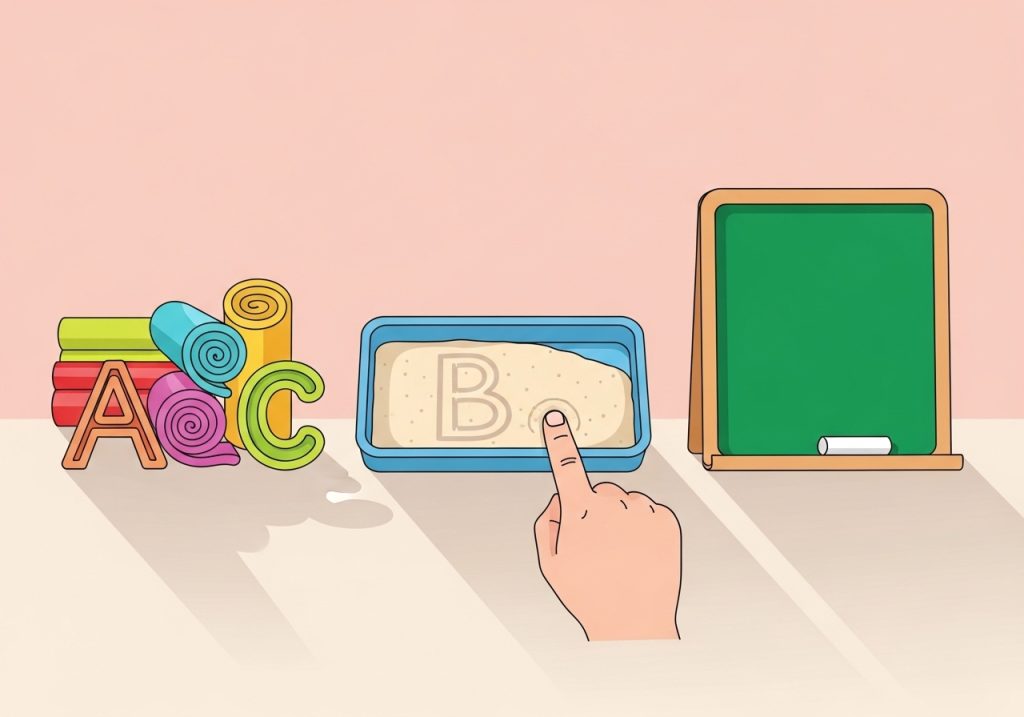
Make this practice fun by drawing in sand, with sidewalk chalk, or on a large whiteboard to engage bigger muscles before transitioning to paper. This large-scale movement helps solidify the motor plan for each shape.
Step 3: Teach Letter Formation Systematically
Teaching letters in alphabetical order can be confusing for learners because the motor patterns are random. Instead, group letters by how they are formed. This repetition builds muscle memory and makes the process more efficient. For example, you can teach all the “magic c” letters together (c, a, d, g, o, q) because they all start with the same initial stroke. Another group could be the “dive down” letters that start with a straight line down (p, b, h, m, n, r). Always emphasize starting letters at the top and using correct stroke sequences. Consistent verbal cues like “start at the top” or “big line down, frog jump up” can be very helpful.
Step 4: Develop Visual-Motor and Perceptual Skills
Handwriting is a visual-motor task. It requires a child to process visual information and translate it into a motor output. Strong visual skills are necessary for forming letters correctly, spacing them appropriately, and keeping them on the line. You can strengthen these skills with specific activities.
- Visual-Motor Integration: This is the ability for the hands and eyes to work together as a team. Activities like mazes, dot-to-dots, and tracing paths help build this connection. Copying simple to complex designs, starting with a basic shape and moving to a series of shapes, also builds this skill.
- Visual Perception: This involves the brain’s ability to make sense of what the eyes see. Work on visual discrimination (finding the difference between similar letters like ‘b’ and ‘d’), visual memory (remembering what a letter looks like and writing it from memory), and figure-ground perception (finding a specific word on a busy page). Simple “I Spy” games or matching worksheets can support these perceptual skills.
Step 5: Incorporate Multi-Sensory Activities
Engaging more senses helps solidify learning. Instead of relying solely on pencil-and-paper drills, make handwriting practice a dynamic experience. This approach is often more motivating and helps create stronger motor memories for letter formation. By incorporating practical sensory activities, you can make practice feel like play while reinforcing important skills.
- Sizing: Use adapted paper to provide strong visual cues. Paper with highlighted bottom sections (like Sky, Grass, Dirt paper) helps learners understand where tall (b, d, h), small (a, c, e), and descending (g, p, y) letters should go.
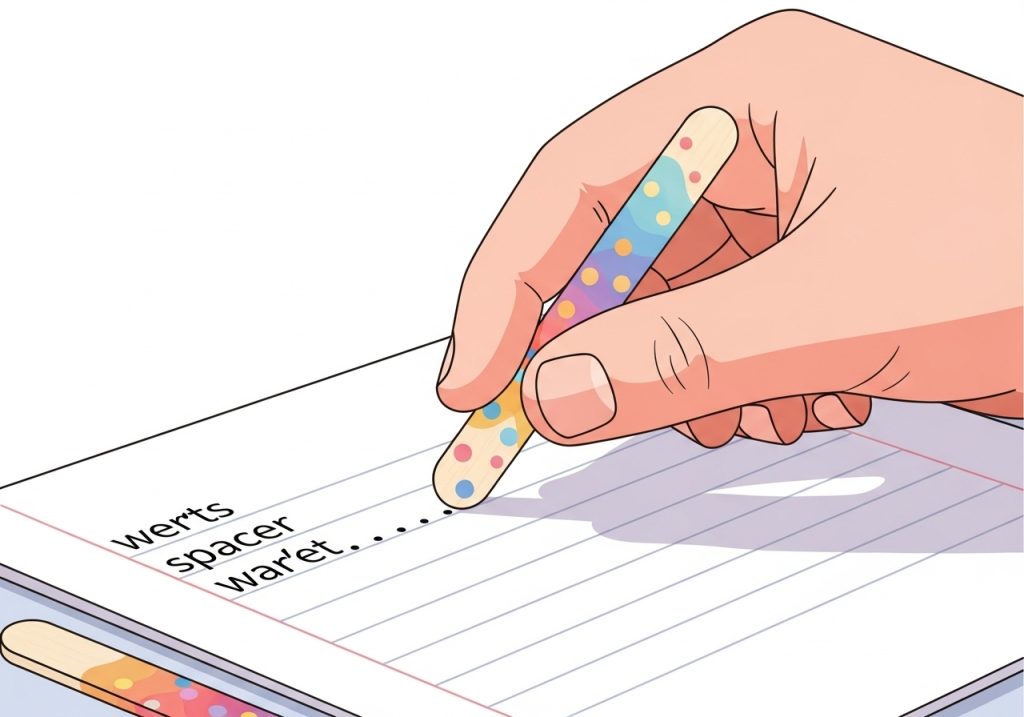
- Spacing: Teach the “finger space” rule by having the child place their index finger after each word. For some learners, a physical object works better. A small craft stick, block, or even a superhero figurine can be a fun “spacer tool” to place between words.
- Alignment: Consistently using lined paper helps reinforce the concept of writing on the baseline. For learners who still struggle, you can use a raised line paper or place a thin strip of glue on the baseline that provides tactile feedback when the pencil touches it.
Step 7: Provide Consistent and Positive Feedback
The goal is progress, not perfection. Handwriting is a developmental process, and every child learns at a different pace. Offer specific, encouraging feedback that builds confidence and a growth mindset. Instead of pointing out every mistake on a page, praise the effort and highlight what was done well. For example, say, “I love how your ‘c’ is sitting perfectly on the line,” or “You did a great job remembering to put a space after that word.” This kind of specific praise is a key component of many effective behavior intervention plans for school because it motivates the child to keep trying.
Improving handwriting is a journey that integrates motor, visual, and cognitive skills. By breaking down the process into these manageable steps, you can provide targeted support that addresses the root of the challenge rather than just the symptoms. Consistency, patience, and a positive attitude are your most valuable tools in helping a learner build this essential skill for academic success and beyond.
Ready to put these strategies into action? Finding the right tools can make all the difference. For low-prep, engaging, and effective resources designed by an occupational therapist, explore the printables and activities in The Inspiring OT shop. You’ll find everything from handwriting practice sheets to fine motor activities that make skill-building a positive experience for every learner.
- Write letters in a tray of sand, salt, or shaving cream.
- Form letters out of play-doh, clay, or pipe cleaners.
- Use a wet paintbrush on a chalkboard or sidewalk. The letters will “magically” disappear as they dry.
- Trace letters on textured paper, like sandpaper, or on a bumpy craft screen.
- Write on a vertical surface, like an easel or paper taped to the wall. This position naturally encourages better wrist extension and shoulder stability.
Step 6: Refine Sizing, Spacing, and Alignment
Once letter formation becomes more automatic, you can focus on the details that improve overall legibility. Many children struggle with sizing letters correctly, leaving enough space between words, and writing on the line. These details are often what makes a piece of writing easy or difficult to read.
- Sizing: Use adapted paper to provide strong visual cues. Paper with highlighted bottom sections (like Sky, Grass, Dirt paper) helps learners understand where tall (b, d, h), small (a, c, e), and descending (g, p, y) letters should go.
- Spacing: Teach the “finger space” rule by having the child place their index finger after each word. For some learners, a physical object works better. A small craft stick, block, or even a superhero figurine can be a fun “spacer tool” to place between words.
- Alignment: Consistently using lined paper helps reinforce the concept of writing on the baseline. For learners who still struggle, you can use a raised line paper or place a thin strip of glue on the baseline that provides tactile feedback when the pencil touches it.
Step 7: Provide Consistent and Positive Feedback
The goal is progress, not perfection. Handwriting is a developmental process, and every child learns at a different pace. Offer specific, encouraging feedback that builds confidence and a growth mindset. Instead of pointing out every mistake on a page, praise the effort and highlight what was done well. For example, say, “I love how your ‘c’ is sitting perfectly on the line,” or “You did a great job remembering to put a space after that word.” This kind of specific praise is a key component of many effective behavior intervention plans for school because it motivates the child to keep trying.
Improving handwriting is a journey that integrates motor, visual, and cognitive skills. By breaking down the process into these manageable steps, you can provide targeted support that addresses the root of the challenge rather than just the symptoms. Consistency, patience, and a positive attitude are your most valuable tools in helping a learner build this essential skill for academic success and beyond.
Ready to put these strategies into action? Finding the right tools can make all the difference. For low-prep, engaging, and effective resources designed by an occupational therapist, explore the printables and activities in The Inspiring OT shop. You’ll find everything from handwriting practice sheets to fine motor activities that make skill-building a positive experience for every learner.
Leave a Reply